

Is baking your own bread worth the effort?
I compared homemade bread to store-bought, and there's a clear winner.

Hi! If you’re new here, welcome to Dish Lister!
I’m a professional recipe tester with a decade of experience developing and testing recipes for cookbooks and food media. Here you’ll find reliable, thoroughly tested recipes and honest recommendations vetted to a professional standard, so you spend less time second-guessing and more time cooking food you’re genuinely excited to make.
For access to every single tested recipe, curated find, and the culinary knowledge behind them, upgrade to a paid subscription today.
There’s something uniquely satisfying about making certain foods from scratch. The flavor, texture, cost, and even the process itself can feel far more rewarding than buying a store-bought version. At the same time, some foods simply aren’t worth the time or effort to make yourself. Sometimes the store-bought option just makes more sense.
My kids and I used to read a book series called Who Would Win? that pitted two animals against each other in a fictional battle of survival to see which would come out on top. I’ve also long admired cookbooks like Make the Bread, Buy the Butter, which breaks down foods from chicken stock to graham crackers and helps readers decide which homemade items justify the extra effort. It’s in that same competitive, analytical spirit that I bring you the first installment of “Make vs. Buy (Which Wins?)”
Every month (or so), I’ll do a head-to-head comparison of a store-bought food versus its homemade counterpart. I’ll evaluate them across several key metrics to determine which I believe is superior when made from scratch, which I’d happily enjoy either way, and which I’d prefer to buy ready-made.
I’ll judge each item based on factors like overall taste, texture, time and effort required, shelf life, and other relevant considerations. In addition to my evaluation (and to stay true to my brand), I’ll also share a list of my tried-and-true recipes and favorite store-bought products for each featured item, along with helpful tips for success.
The subject of my first head-to-head matchup is a fun one: bread!
I chose bread for this first comparison because it’s relatively basic, highly sensory, widely familiar, and interestingly driven by differences in the production process. My focus today is on yeast-based breads. We’re not going down the sourdough rabbit hole just yet (maybe another time!)…
Anyway, let’s dive in!
Bread: Make vs. Buy (Which Wins?)
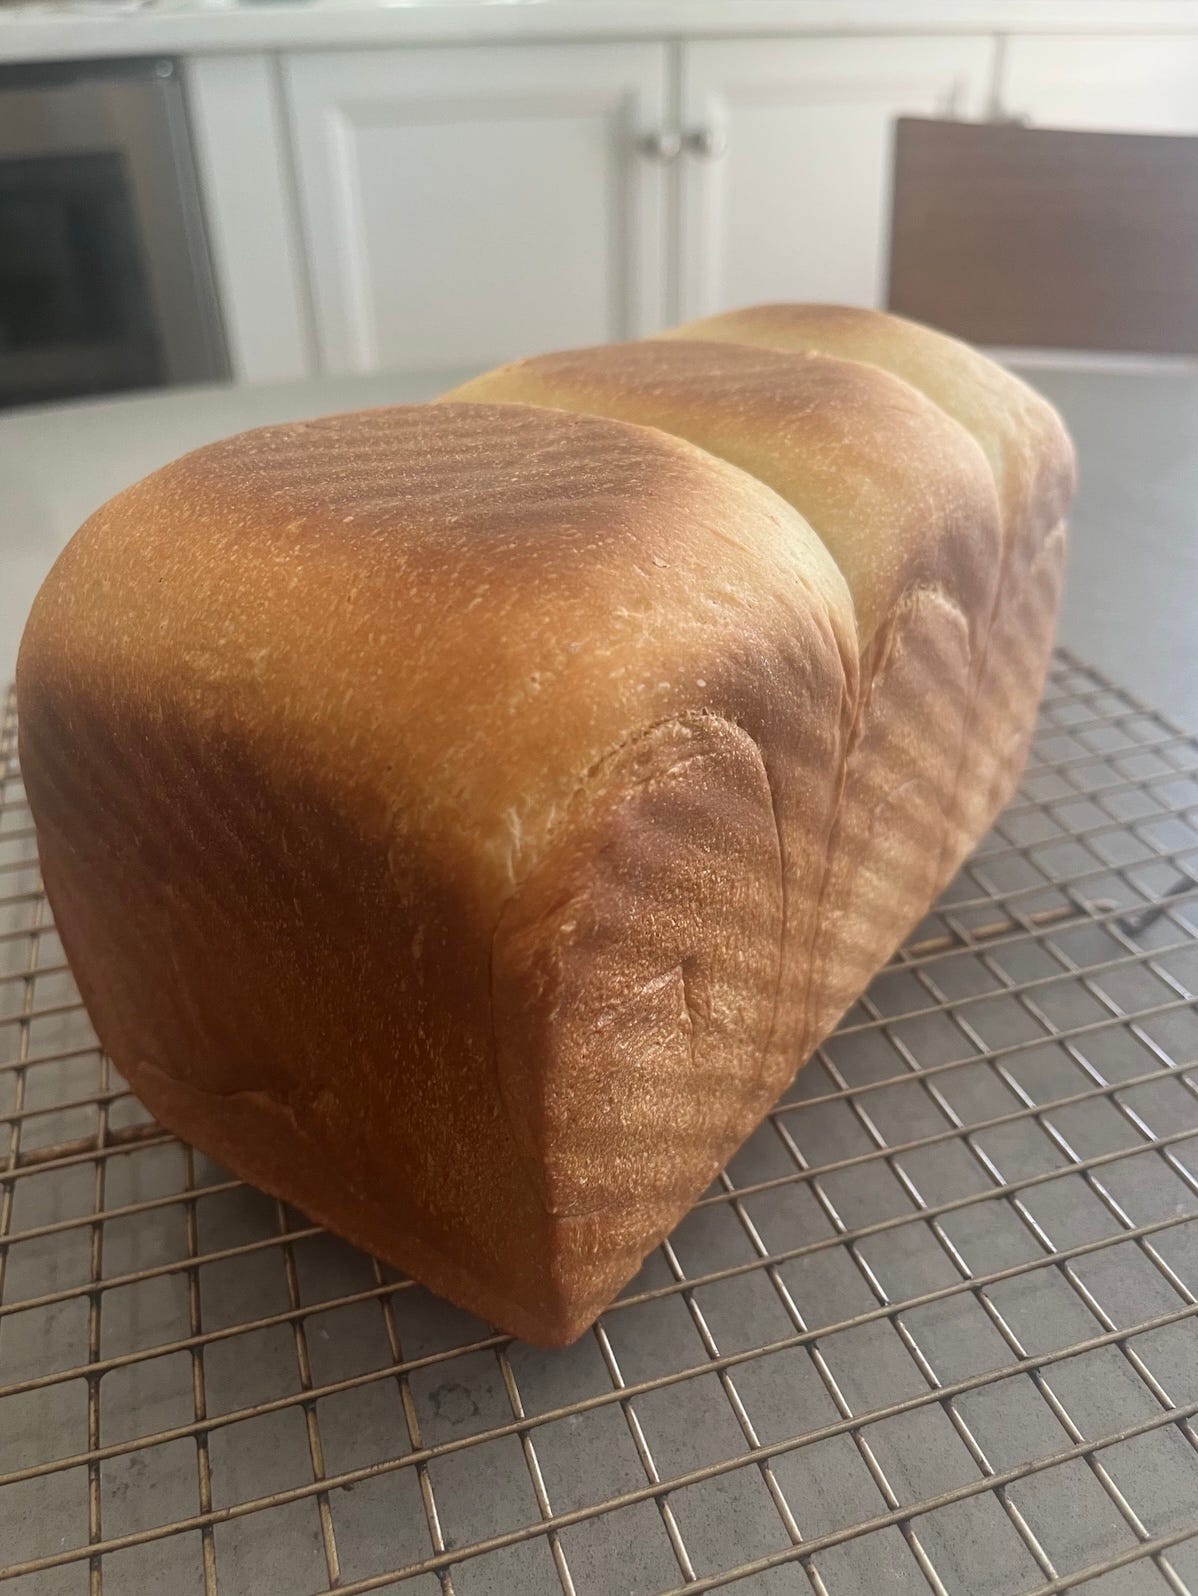
TASTE: Homemade wins
I mean, is this even really a contest? Freshly baked homemade bread tastes far better than most store-bought loaves that aren’t baked fresh in a bakery. The longer rise times used in homemade bread recipes often create a sweeter, slightly tangier flavor that gives the bread a deeper, more complex taste. In contrast, commercial loaves typically undergo shorter fermentation periods, sacrificing some of that flavor depth for speed and convenience.
Home bakers, if they so choose, also have the luxury of using more water and higher-quality flour, butter, whole grains, and seeds without worrying as much about shelf life or large-scale production costs. These ingredients make a noticeable difference in both flavor and texture.
And speaking from plenty of first-hand experience, few things are better than a pat of butter melting into a still-warm slice of homemade bread. Most packaged loaves simply can’t compete.
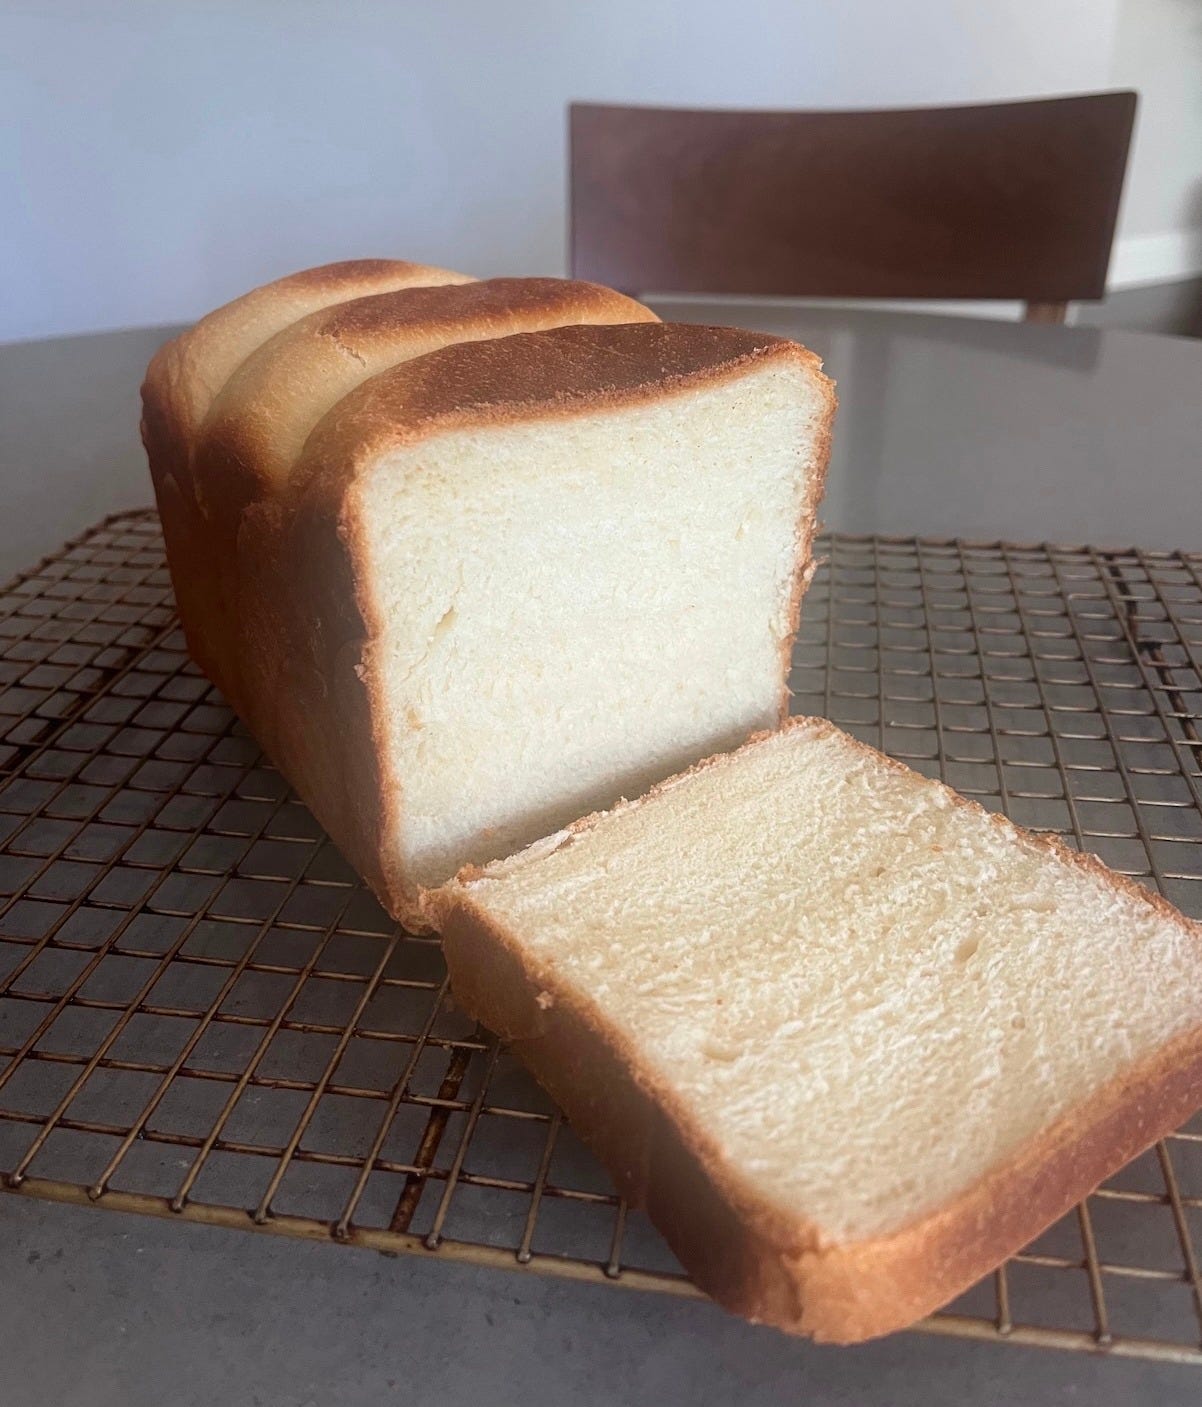
TEXTURE: Homemade wins (provided it’s consumed within 1–3 days of baking or frozen)
Homemade bread begins to lose its aroma and texture within hours of baking, which is why it’s best enjoyed at its peak—typically within one to three days. During this window, the crust remains crisp and the interior stays moist and soft. It’s this contrast between crust and crumb that gives homemade bread its clear textural advantage.
Store-bought bread, on the other hand, tends to have a softer, more uniform texture throughout due to preservatives and packaging, making it slightly less satisfying in comparison.
TIME & EFFORT REQUIRED: Homemade wins (because the final payoff is rewarding)
Does making homemade bread require time and patience (with several hours needed just for the two rises)? Yes! And that’s where store-bought bread has the advantage of convenience.
But time and effort aside, I also find the process of making bread highly enjoyable and rewarding. Kneading, proofing, scoring, and baking all build anticipation for the final payoff. And there’s real psychology behind it: food you prepare yourself often genuinely tastes better because you made it.
SHELF LIFE: Store-bought wins (only a slight edge, as there are ways to extend the life of freshly baked bread)
One challenge with homemade bread (along with many other “made from scratch” foods) is how quickly it goes stale. It’s best enjoyed within a few days of baking, unless frozen to extend its shelf life. Store-bought bread, on the other hand, can last for days—sometimes even weeks—in the cupboard. It’s specifically designed to withstand shipping, stacking, and extended time on store shelves. That longer shelf life is often achieved through added preservatives that help maintain softness and freshness. (The obvious exception is fresh bakery bread from a grocery store or local bakery, which tends to stale more quickly since it generally contains fewer preservatives.)
To maximize the freshness of a homemade loaf: Let the bread cool completely before storing. Keep it cut-side down on a cutting board, or wrap it loosely in a clean kitchen towel or paper bag. (If you have a bread box, that works too.) Store at room temperature, away from direct sunlight and heat. Never refrigerate bread—this actually accelerates staling and dries out the crumb.
If you want to keep bread fresh beyond a few days while maintaining quality, freeze it tightly wrapped in plastic wrap or foil for up to a month. For convenience, you can also pre-slice the loaf before freezing.
OTHER IMPORTANT FACTORS:
Aroma: If I could bottle up the scent of freshly baked bread, I absolutely would. It’s one of the most pleasant smells imaginable, and I’m perpetually envious of people who live near bakeries. When I bake bread and that wonderful aroma fills the house (thanks to the Maillard reaction), I’m one happy camper.
Cost: Cost is fairly negligible here. A loaf of bread from the grocery store typically costs anywhere from $3–6, depending on the brand, type of bread, and where you live. Homemade bread, on the other hand, is usually made from inexpensive pantry staples that many people already buy in bulk: flour, water, yeast, salt, sugar, and sometimes milk or eggs.
THE VERDICT: Make it!
Ultimately, the superior taste, texture, and rewarding process give homemade bread a strong edge over store-bought bread. This one is not even close. (Duh.)
There’s just nothing quite like homemade bread: the intoxicating smell, the soft texture, the taste. It engages every sense in the most satisfying way!
Tips for making better bread
Many people avoid making their own bread because they find it too intimidating. But, as someone who once felt that way myself, I’m here to tell you it’s not. With time, practice, and a little patience, a delicious loaf of freshly baked bread is very attainable, especially once you understand a few basic bread-making principles.
Here are 8 easy tips for making better homemade bread:
Weigh your ingredients. I say this for most of my baking, but it’s especially true for bread, which is very sensitive to precise ratios if you want consistent results.
Use fresh, non-expired flour and yeast. Beyond the obvious loss of flavor that older flour can develop, it can also lose strength and elasticity, weakening the gluten network and leading to a poorer rise and denser bread. Similarly, expired yeast becomes less effective over time, weakening fermentation and producing less consistent results.
Hydration. Hydration. Hydration. Higher hydration doughs (those with more water) usually produce a more open, airy crumb, but, as you might expect, they’re also stickier and harder to work with. Start with a more manageable dough, then experiment by gradually increasing the hydration level as you become more comfortable.
Develop your gluten. Whether you are kneading, using a stretch-and-fold method, or simply letting time do the work, you want your dough to become elastic and slightly smooth (signs of well-developed gluten). Underdeveloped gluten leads to denser bread.
Let it rise. Be patient and allow the dough to rise slowly (you can even refrigerate it overnight) to develop optimal flavor and texture. The initial rise—often called bulk fermentation—is when yeast releases carbon dioxide and flavor compounds, allowing the dough to expand and build complexity. The second rise, or proofing, happens after shaping, when the dough is allowed to rise again before baking. While patience is important during both stages, there are limits; overproofing can lead to a poor rise, large irregular holes, or a dense, gummy texture.
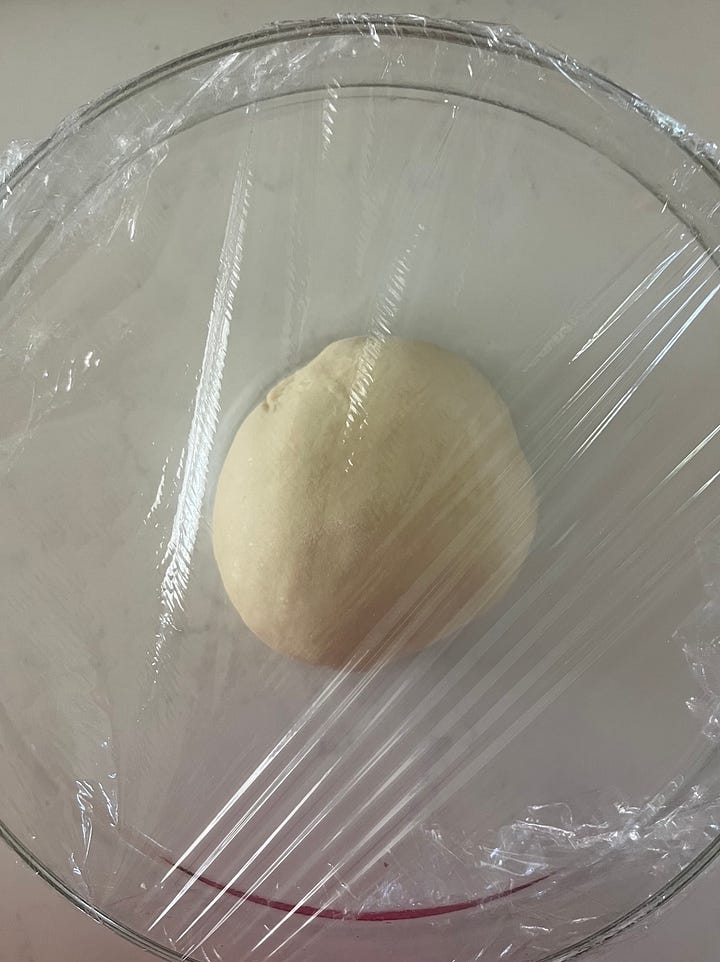
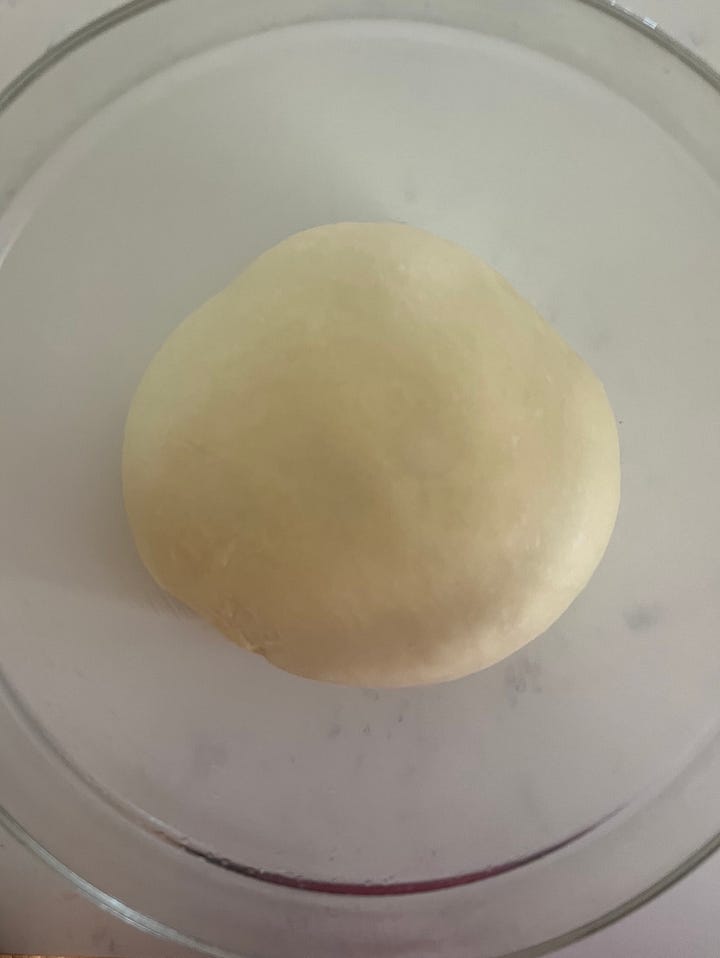
Before and after: scenes from a first rise Use steam to create a nice crust. In the early stage of baking, steam keeps the surface of the dough flexible, allowing the bread to expand fully and develop better color and a thinner, crispier crust. Without it, the exterior can set too early and limit expansion.
Two easy ways to create steam:
Place an oven-safe pan or cast iron skillet on the bottom rack while the oven preheats, then carefully pour hot water into it when you put the bread in. Close the oven quickly to trap the steam.
Bake the dough inside a lidded Dutch oven. The dough releases its own moisture, creating a natural steam environment. Remove the lid halfway through baking to allow the crust to brown.
Avoid underbaking. Underbaking results in an unpleasant, gummy interior that no one wants. Two telltale signs of doneness are a deep golden crust and a hollow sound when tapped on the bottom. For even greater certainty, you can check the internal temperature with a thermometer (around 190–210°F, depending on the bread).
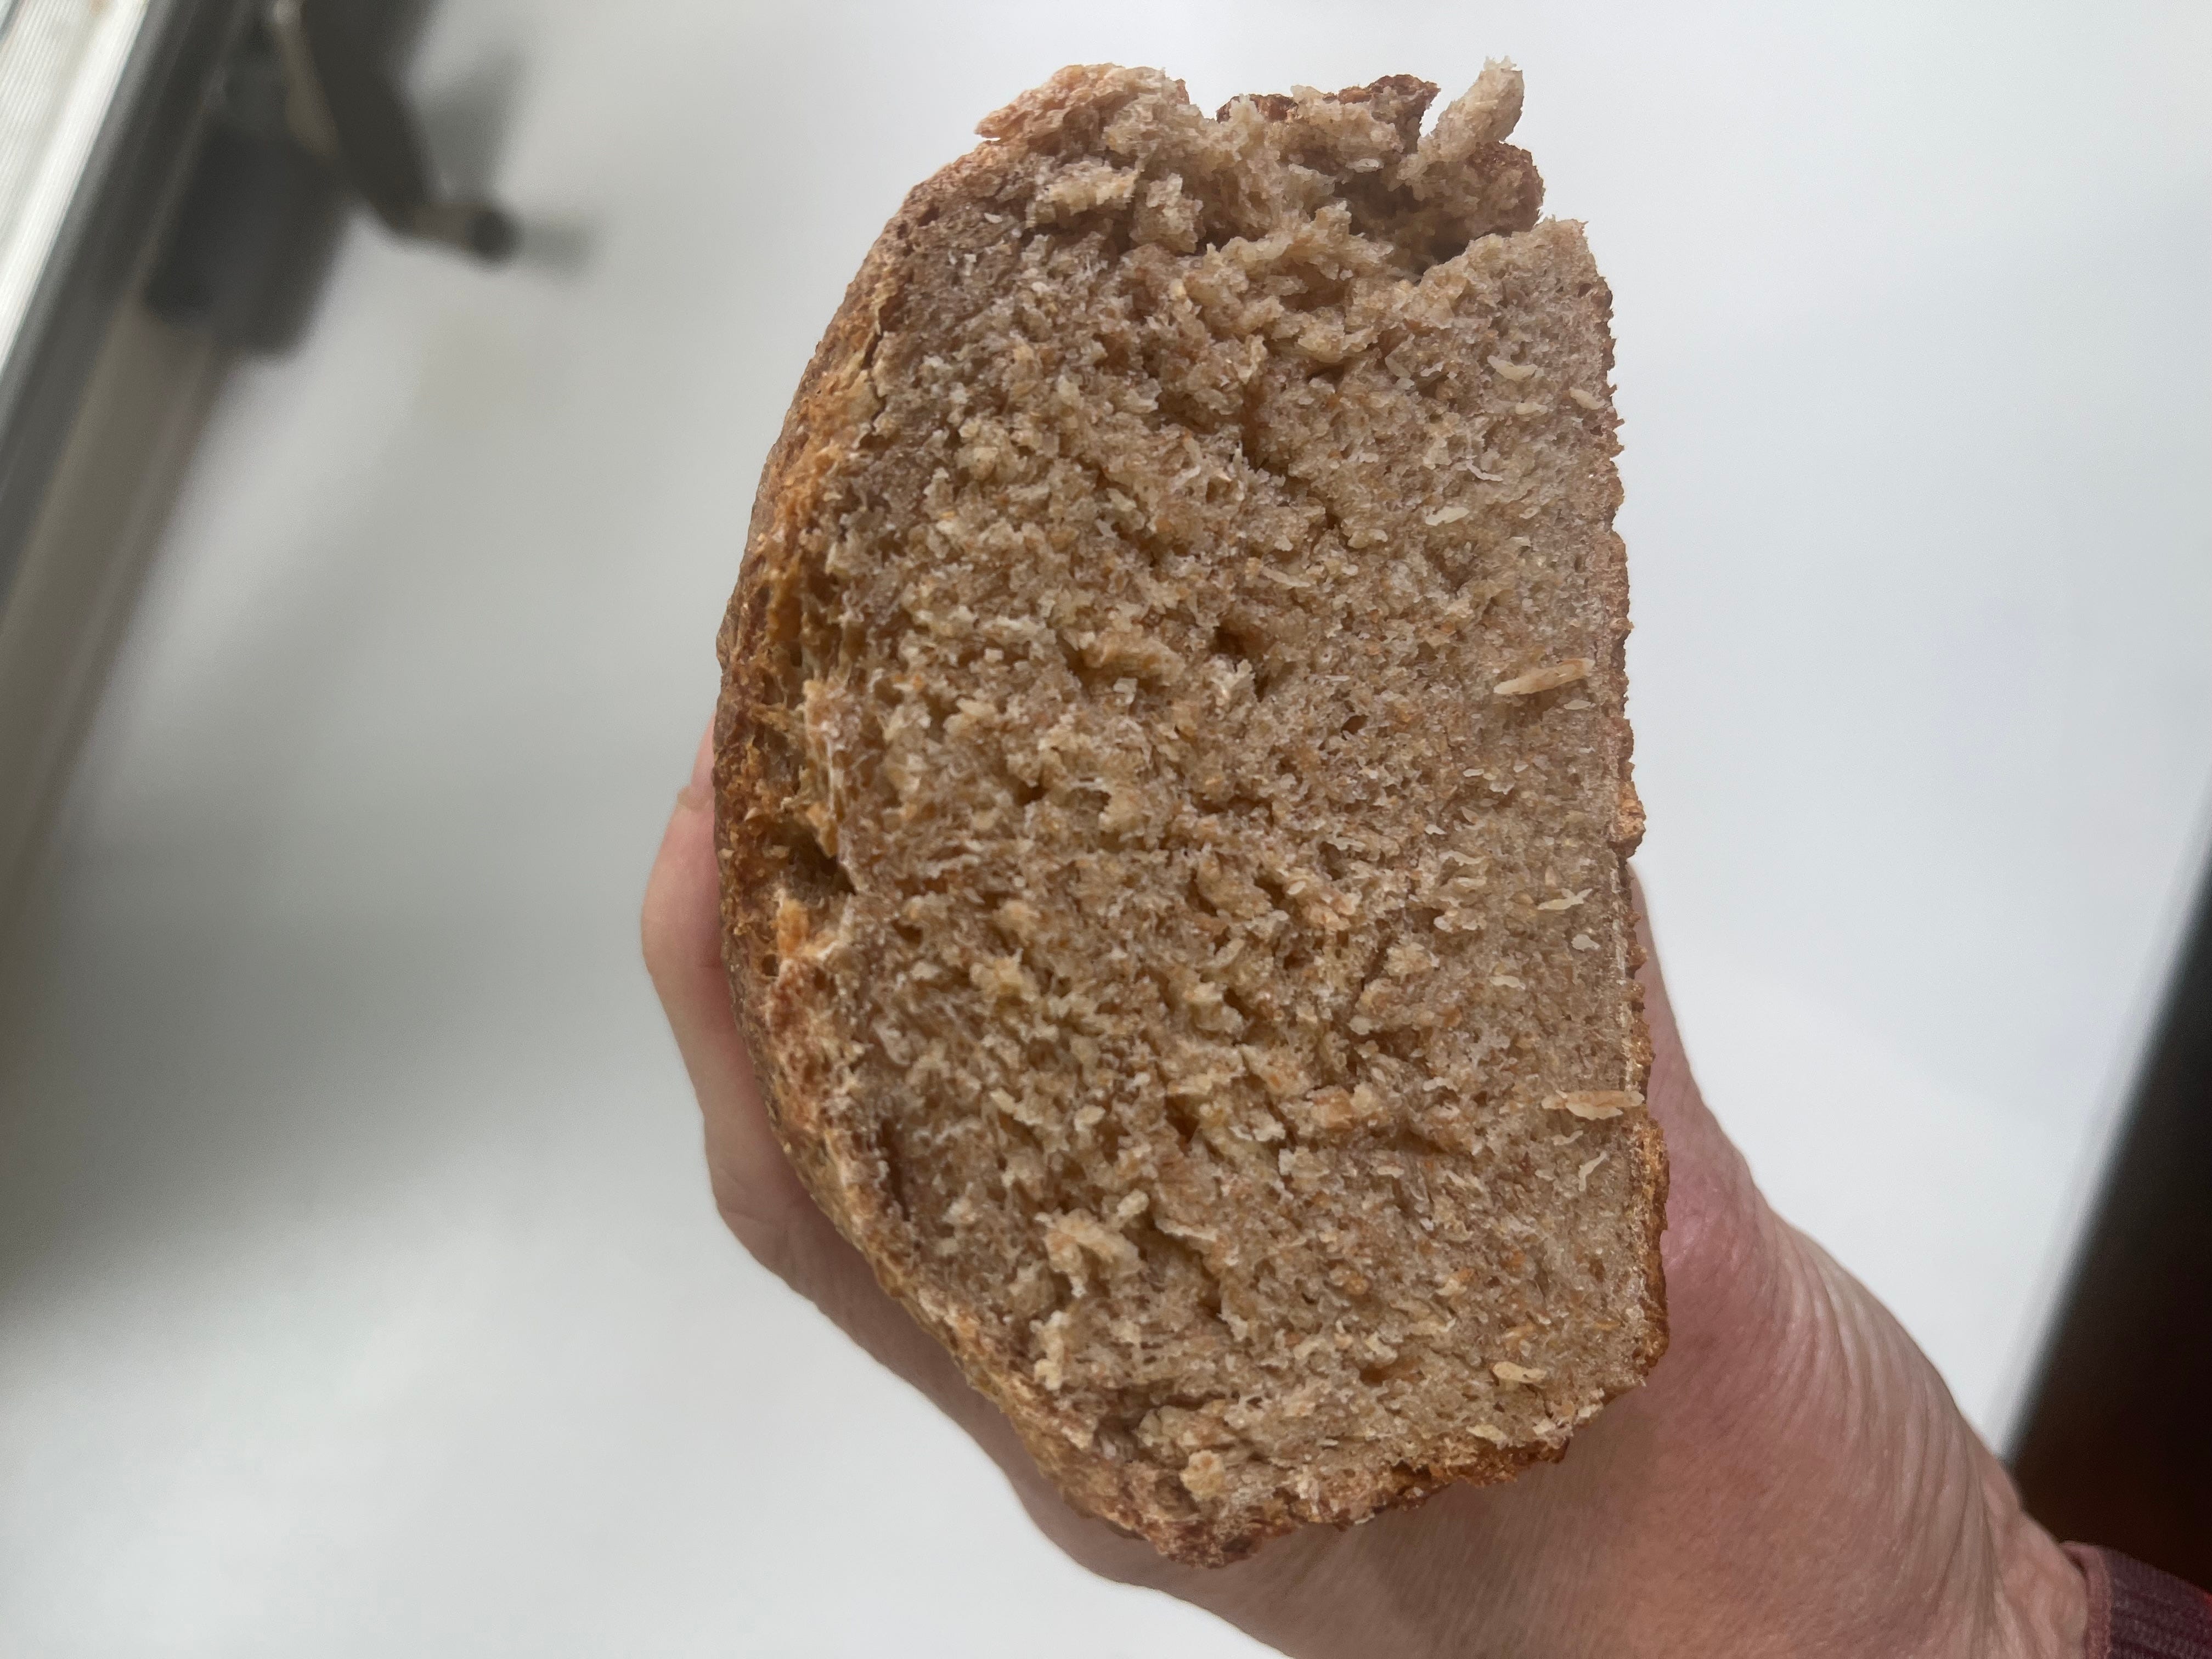
Let it cool. Cutting into bread straight out of the oven releases steam and can leave the crumb gummy, since the interior continues to set for a short time after baking. I know it’s hard to resist, but it’s worth the wait. Depending on the recipe, let the bread cool anywhere from 10 minutes to an hour before slicing so it can fully settle. Many recipes include specific cooling guidelines.
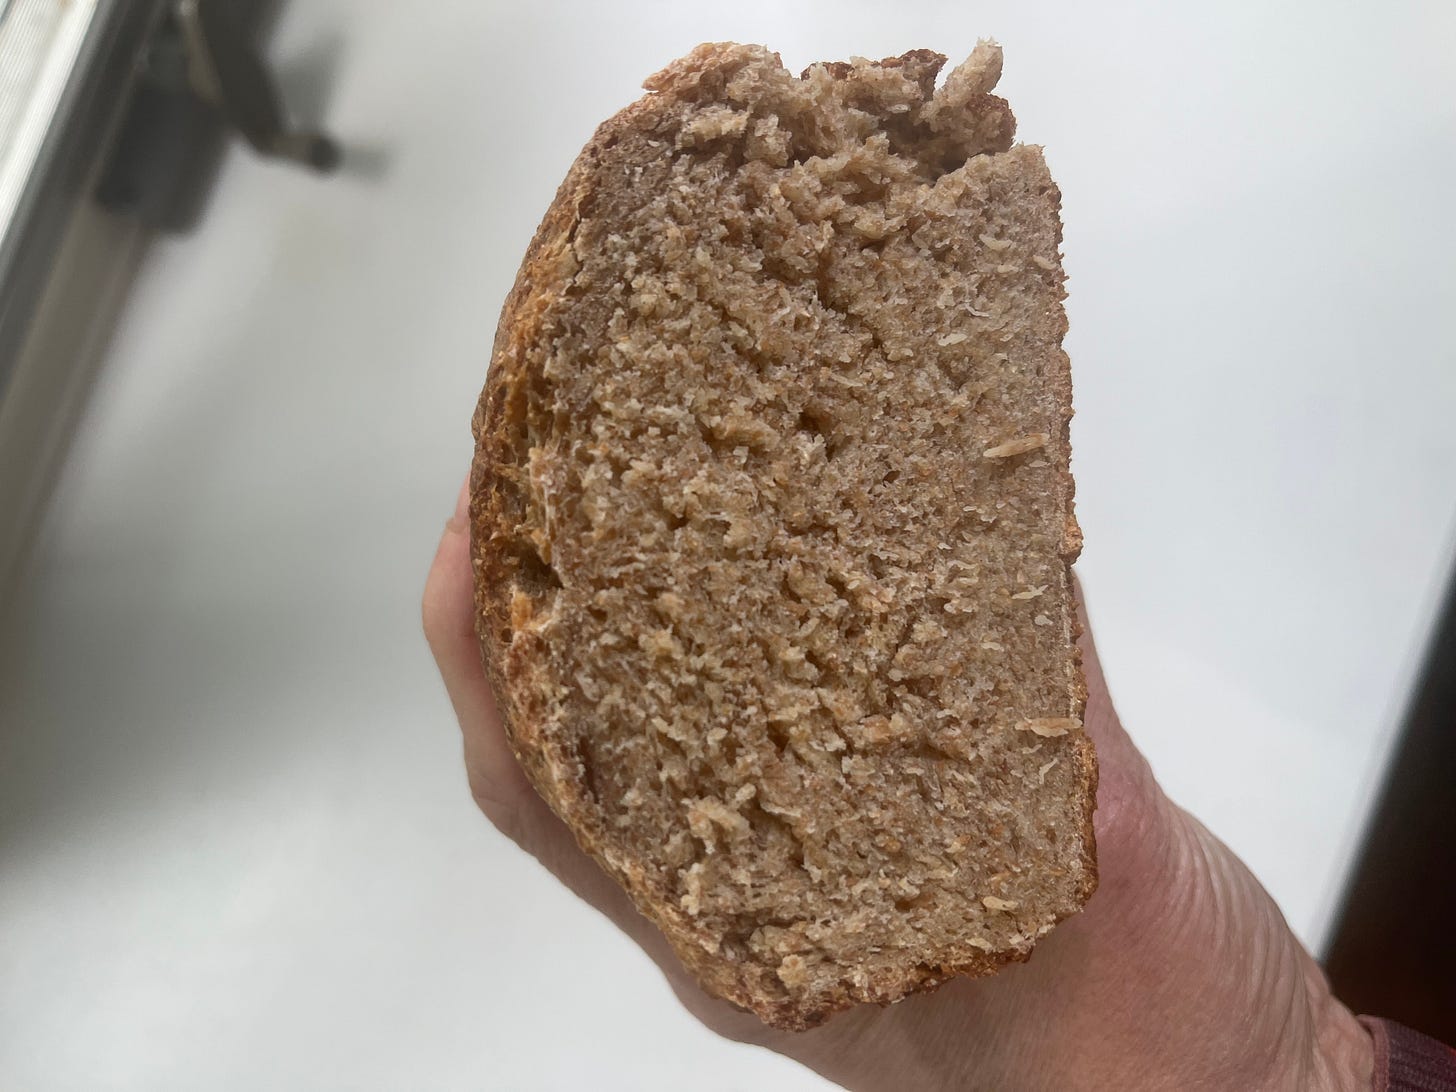
Cutting into bread too soon while it’s still cooling (sometimes you just don’t want to wait!) can result in a gummy interior, as seen here.


A few excellent bread recipes:
Simply Sandwich Bread, Sally McKenney, Sally’s Baking. About as foolproof as it gets and oh so delicious.
Milk bread, Kristina Cho, Mooncakes and Milk Bread: Sweet and Savory Recipes Inspired by Chinese Bakeries. Milk bread (shokupan) is one of my favorites because it has a soft, stretchy texture and a richer flavor than classic sandwich bread, thanks largely to tangzhong, a technique where some of the flour is cooked with water or milk into a paste before being mixed into the dough. This recipe is simple to make and delivers great results. I also love variations like this banana version (paid subscriber link), which turns into exceptional French toast.
No-Knead Bread (gift link), Jim Lahey (adapted by Mark Bittman), New York Times Cooking. This low-effort, no-knead bread technique is a game changer, and if you’re intimidated by bread making, this is definitely a great place to start. The method relies on time and hydration rather than physical kneading to develop gluten and structure. Many versions, like this one, require a Dutch oven, a very forgiving baking vessel that, as noted earlier, creates a self-contained steam environment for a crisp crust. I’ve recently been experimenting with flavor variations, like this scrumptious cheese bread, which is a fun change of pace.


Plus, here are a few more bread recipes I’m excited to try:
No-Knead Rye Bread, Alexandra Stafford, Alexandra’s Kitchen.
Classic 100% Whole Wheat Bread, PJ Hamel, King Arthur Baking.
No-Knead Cumin and Yogurt Bread, Leslie Bulut, A Bite of Delight.
And, of course, you’ll also need something delicious to make with all that freshly baked homemade bread. I, for one, always go for a simple but tasty PB&J!
Would you like to see more installments of this Make vs. Buy series featuring comparisons of different homemade vs. store-bought foods? Let me know in the comments below.
Have a delicious week!
Kerry
P.S. A few of the links in this post are affiliate links, which means I may earn a small commission if you make a purchase (at no extra cost to you). Not a bad deal, right? 😊
Homemade bread is 100 % worth the fairly minimal effort. Of course, as with most things, there’s somewhat of a learning curve, but that is worth the effort too.
This goes double for gluten free bread! Unless you live in a major city or Italy, Spain, or Argentina the gluten free bread choices are probably far inferior to what you could make at home!